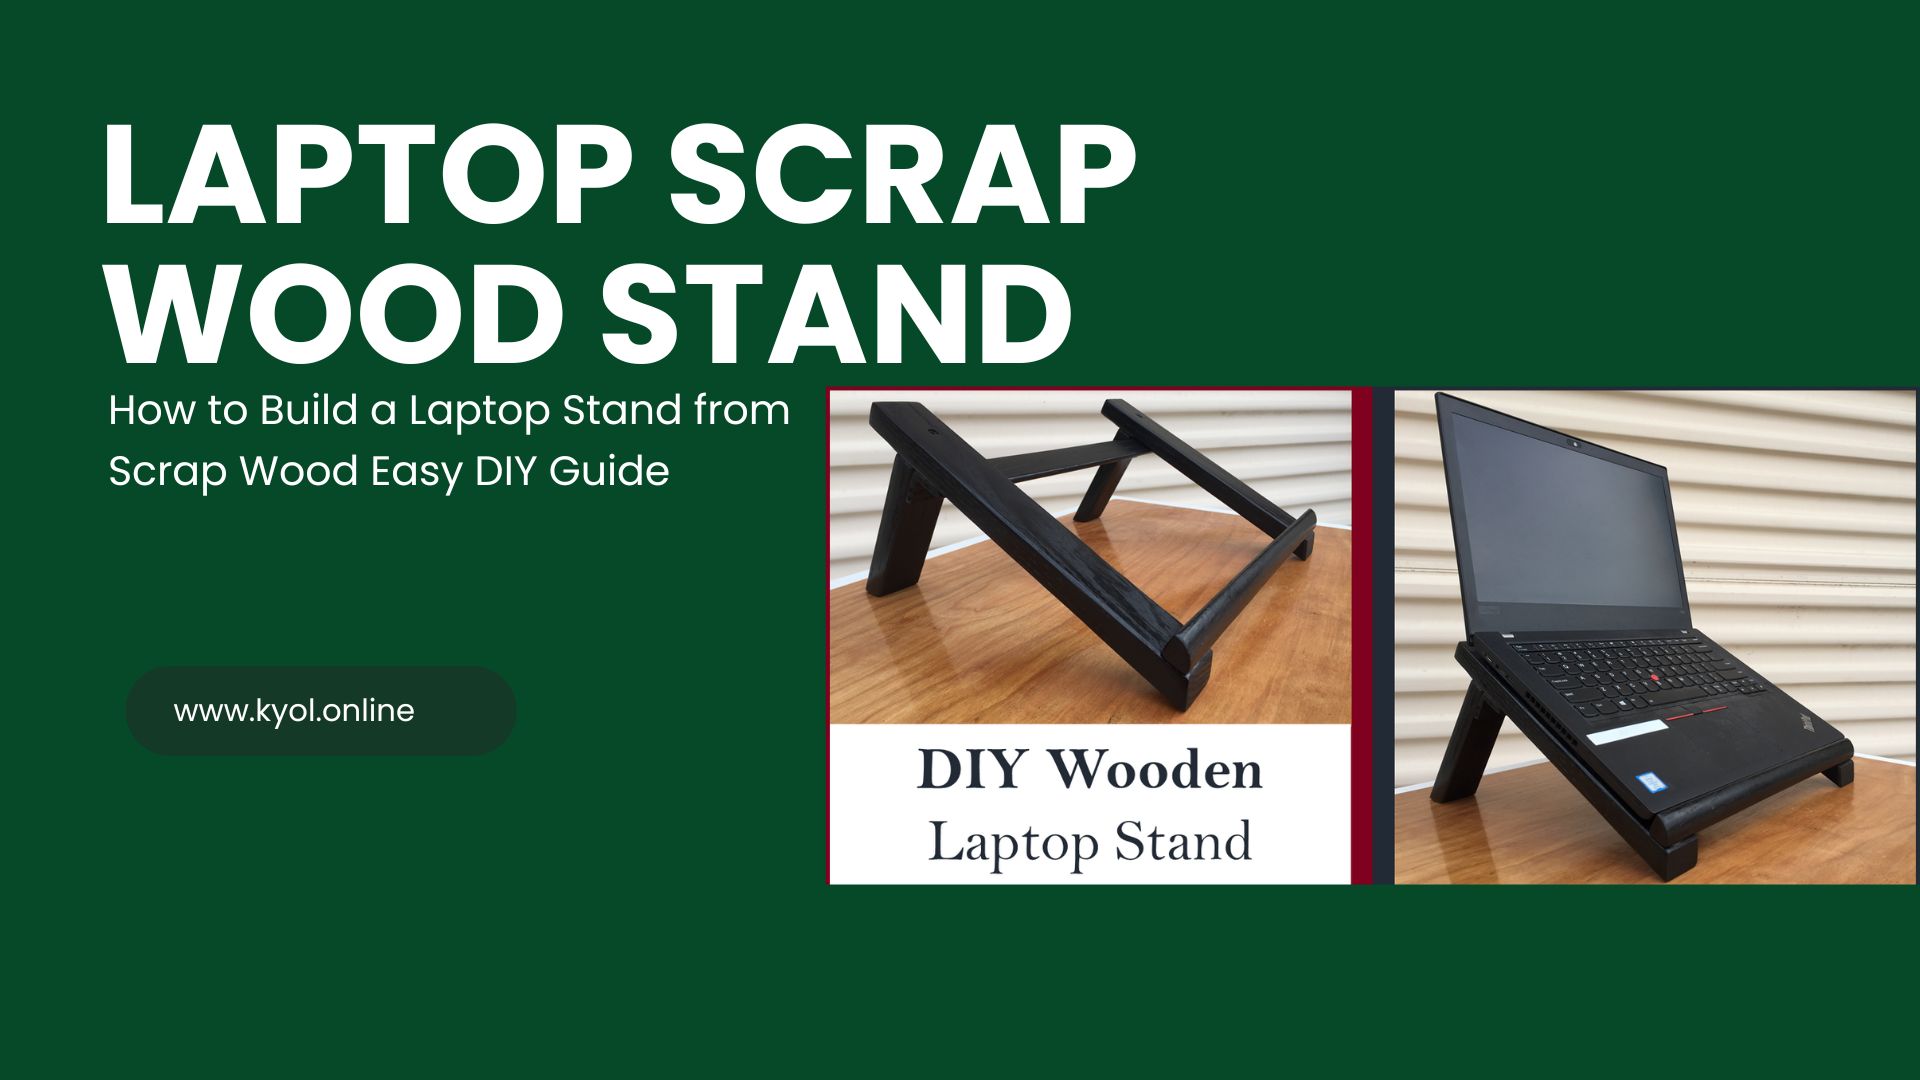
How to Build a Laptop Stand from Scrap Wood
Tired of looking down at your screen and feeling the strain on your neck? You are not alone. A laptop stand is a game changer for anyone who spends hours working from a desk. But instead of buying one why not build a laptop stand from scrap wood?
This DIY project is simple eco friendly and can be completed in under an hour using basic tools. In this guide you will learn how to make a functional stylish wooden laptop stand using materials you probably already have at home. Whether you are a woodworking newbie or a weekend DIYer this project is perfect for you.
Why Build a Laptop Stand from Scrap Wood?

Aside from being a fun and satisfying DIY project there are plenty of reasons to build your own stand:
- Ergonomics – Raise your laptop to eye level and reduce neck/back strain.
- Cost-Saving – No need to buy a $50+ laptop stand.
- Eco-Friendly – Reuse leftover wood and reduce waste.
- Customizable – Design the size, shape and finish to suit your workspace.
What You’ll Need
Materials
- Scrap wood (plywood, pallet wood or leftover boards)
- Wood glue
- Screws or nails
- Sandpaper or sanding block
- Optional: Paint, stain, wood finish
Tools
- Measuring tape or ruler
- Saw (hand saw, circular saw or jigsaw)
- Drill or screwdriver
- Pencil for marking
- Clamps (optional but helpful)
Step by Step: Build a Laptop Stand from Scrap Wood

Step 1: Measure Your Laptop
Use a measuring tape to check the width and depth of your laptop. Add an inch or two on each side for stability.
Example for a 15” laptop:
- Width: 14–15 inches
- Depth: 9–10 inches
- Height: 5–6 inches (with a backward tilt)
This will ensure your stand fits your device comfortably and offers ergonomic support.
Step 2: Cut the Wood
Cut the following pieces from your scrap wood:
- Top Platform: Flat piece where your laptop will sit
- Side Panels (2): Triangular or rectangular for angled support
- Optional Front Lip: A thin strip to keep your laptop from sliding
Make sure the side panels are cut at an angle to raise the back and tilt the laptop slightly forward.
Step 3: Sand All Pieces
Use sandpaper or a sanding block to smooth all surfaces and edges. This makes the stand look professional and prevents splinters.
Tip: You can also round the corners for a more polished look.
Step 4: Assemble the Stand
- Attach the top platform to the side panels using wood glue and screws or nails.
- If using a front lip glue and nail it to the front edge of the platform.
- Use clamps to hold everything in place while drying.
- Let dry for at least 30 minutes before testing.
Ensure everything is level and stable before placing your laptop on it.
Step 5: Finishing Touches
Now that your stand is built you can leave it rustic or add a custom finish:
- Apply wood stain for a rich color
- Paint it to match your room
- Add a clear coat for durability and water resistance
Bonus Features to Add

Want to go the extra mile? Here are a few upgrades you can make:
Ventilation Slots
Cut holes or slits in the top platform to prevent your laptop from overheating.
Cord Management
Drill a hole or notch in the back to route your power cable or USB hub neatly.
Storage Shelf
Add a lower platform for a keyboard, notebook or accessories.
Common Mistakes to Avoid
- No measurements: This leads to unstable or wobbly stands.
- Uneven cuts: Use a guide or ruler for straight lines.
- No sanding: Rough wood can damage your laptop and your hands.
- Flat design: Always tilt the stand for comfort and ventilation.
FAQs
Q1: Can I build a laptop stand without power tools?
Yes! You can use a hand saw, hammer and nails instead of power tools. It may take a bit longer but its completely doable.
Q2: What kind of wood is best for a DIY laptop stand?
Plywood, pine or any sturdy leftover hardwood will work well. Avoid thin or warped boards.
Q3: Is the stand safe for heavy laptops?
Yes as long as your joints are secure and the structure is balanced it can support even heavier laptops like gaming rigs.
Q4: Can I paint or decorate the stand?
Absolutely. You can stain it paint it or even add decals and designs to make it uniquely yours.
Q5: What if I do not have clamps?
You can carefully hold the pieces together while screwing or nailing them. Just make sure they stay aligned.
Conclusion
Building a laptop stand from scrap wood is a fun, fast and functional DIY project that anyone can do. With just a few materials and tools you can transform your work setu reduce physical strain and enjoy the satisfaction of creating something useful with your own hands.