
Looking to spruce up your space flex your creativity or just kill time productively? Good news you do not need a weekend or a workshop to tackle DIY. These 5 simple DIY projects can be done in under an hour require minimal tools and are perfect for beginners. Plus they are fun budget friendly and super satisfying!
Why Quick DIY Projects Are Totally Worth It
Life is busy we get it. But DIY does not have to mean complicated blueprints or expensive supplies. Quick one hour projects are perfect for:
- Boosting creativity
- Adding personal touches to your home
- Saving money
- Gaining confidence for bigger projects later
So grab your tools (do not worry we are talking scissors and glue not chainsaws) and lets get started.
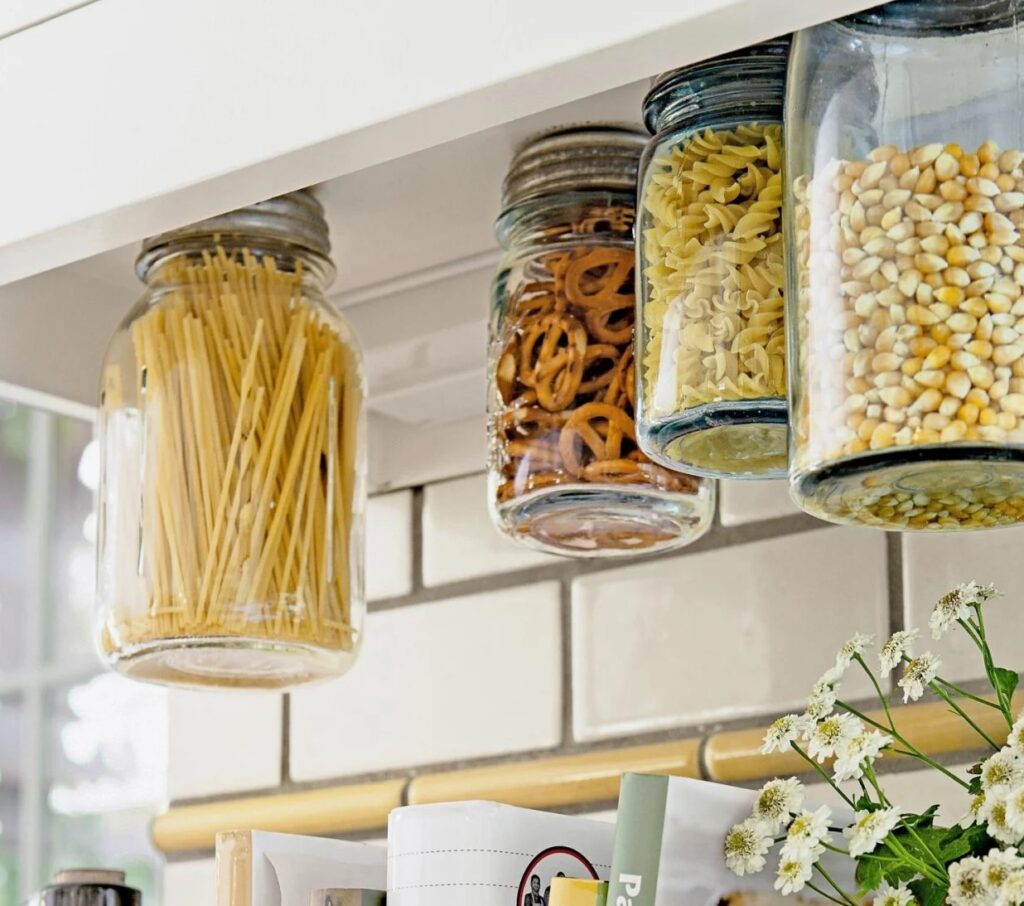
1. Custom Mason Jar Organizer
Time: Around 45 minutes
Tools & Materials:
- 3 to 4 mason jars (or more depending on the space)
- Hose clamps (1 per jar)
- A wooden board (reclaimed or store bought)
- Screws
- Drill or screwdriver
- Measuring tape
- Wall anchors (optional for extra support)
- Sandpaper (optional to smooth the board)
- Paint or stain (optional for a polished look)
What Is It?
This is a stylish wall mounted organizer made from mason jars securely attached to a wooden board using hose clamps. It works like a floating shelf but instead of open shelves you have got see through rustic style jars that keep everything neat and visible.
How to Make It (Step by Step)
Step 1: Prep Your Wood Board
- If needed sand down the board to smooth any rough edges.
- You can paint or stain the wood for a more finished look or leave it raw for a rustic farmhouse vibe.
Step 2: Measure & Mark
- Lay your jars on the board to see how much space each one will need.
- Use a pencil to mark evenly spaced spots where each hose clamp will go. Make sure there is enough room for the jars to sit comfortably.
Step 3: Attach Hose Clamps
- Use a screw to secure each hose clamp directly onto the board at the marked spots.
- Keep the clamp slightly loose so you can slide the jar in easily.
Step 4: Insert the Jars
- Once clamps are attached slide a mason jar into each one.
- Tighten the clamp using a screwdriver so the jar is snug but not too tight you do not want to crack the glass.
Step 5: Mount the Organizer
- Use screws or wall anchors to hang the wooden board on your wall.
- Make sure its level nobody likes a crooked shelf!
What Can You Use It For?
The beauty of this DIY is in its versatility. Here are some popular ideas:
- In the kitchen: Store herbs, wooden spoons or dry goods.
- In the bathroom: Organize toothbrushes, cotton balls or makeup brushes.
- In your office or craft room: Hold pens, scissors, buttons or small supplies.
- As a planter: Use for succulents or air plants (just do not overwater).
Why You will Love It
- Space saving: Perfect for small spaces or cluttered counters.
- Stylish: It looks like something straight out of Pinterest.
- Functional: Keeps essentials in view and within reach.
- Customizable: Paint it, stain it or add labels make it yours!
This project is perfect for beginners and only takes around 45 minutes but the result looks like something you dont buy from a trendy home decor store. Whether you want to tidy up or just add a DIY touch to your home, this mason jar organizer checks all the boxes: practical, pretty and proudly homemade.
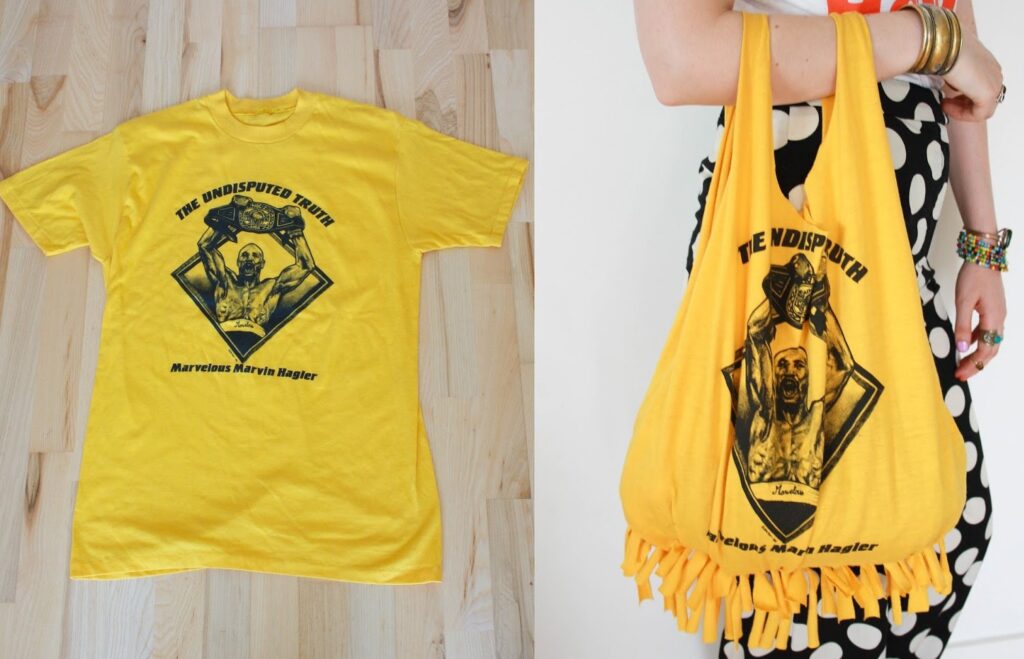
2. No Sew T Shirt Tote Bag
Time: About 30 minutes
Tools & Materials:
- 1 old T shirt (the thicker the fabric the sturdier the bag)
- A good pair of fabric scissors
- Ruler or measuring tape (optional but helpful)
- Marker or chalk (optional for cleaner cuts)
What Is It?
This is an easy eco friendly tote bag made from an old T shirt no sewing machine, needle or thread required. By cutting and tying simple knots you will turn a worn out tee into a reusable bag that is perfect for groceries, books or beach trips.
How to Make It (Step by Step)
Step 1: Choose Your T Shirt
- Pick a T shirt that is clean not too thin and ideally one with a fun print or color.
- Lay it flat on a table or smooth surface.
Step 2: Cut Off the Sleeves
- Use scissors to cut off both sleeves along the seams.
- This will create the “handles” of your tote.
Tip: Want thicker handles? Cut just inside the sleeve seam instead of on it.
Step 3: Cut the Neckline
- Cut a U shape around the collar to make the bag opening.
- Go deeper for a wider opening or shallow for a more secure bag.
Optional: Use a bowl as a stencil for a smooth curve.
Step 4: Cut Fringe at the Bottom
- Turn the shirt inside out (important!).
- Cut vertical slits (about 3 to 4 inches long and 1 inch wide) along the bottom hem front and back together to create fringe strips. These will be tied together to seal the bottom.
You should now have little dangling strips on both the front and back hem.
Step 5: Tie the Bottom Closed
- Start tying the front and back strips together in tight double knots.
- For extra strength tie a few of the inner strands to their neighbors for a tighter seal.
- Once done turn the bag right side out your knots will now be hidden inside.
Why It Works
- Eco friendly: Reuse what you already have instead of tossing old clothes.
- No sewing skills needed: If you can cut and tie a knot you can make this bag.
- Customizable: Use different shirts, dye them or decorate your bag.
- Surprisingly strong: Especially with thicker tees or double layered knots.
Perfect For:
- Farmers market trips
- Library books
- Gym gear
- Gift wrap alternative
- Kids craft projects
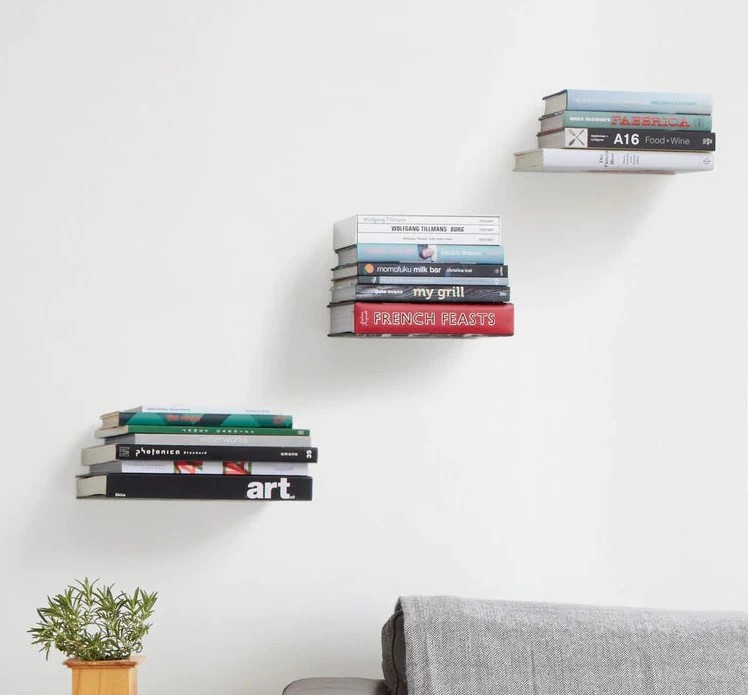
3. Floating Bookshelf
Time: About 50 minutes
Tools & Materials:
- 1 to 2 sturdy L brackets (per shelf)
- Screws and wall plugs (if needed for drywall)
- Electric drill or screwdriver
- Level (optional but helpful)
- 1 thick hardcover book (for the base)
- Several books to stack on top
What Is It?
This is a clever illusion bookshelf that looks like a stack of books is floating in mid air with no visible shelf underneath. Its a minimalist space saving solution that doubles as art. Its great for small spaces or anyone who loves quirky eye catching decor.
How It Works
The secret? You attach the L brackets to the inside back cover of a sturdy hardcover book. That “base” book hides the brackets and becomes the shelf. Then you stack more books on top and voila it looks like magic!
How to Make It (Step by Step)
Step 1: Choose Your Base Book
- Pick a sturdy hardcover book that you do not mind sacrificing. It should be thick enough to support the brackets and stack a few more books on top.
Tip: Use a book with a decorative spine for extra flair!
Step 2: Attach L Brackets to the Book
- Open the back cover of the book.
- Align the L brackets near the spine with the flat part against the inside of the back cover.
- Drill or screw through the cover into the brackets (use short screws so they do not go all the way through the cover).
- Close the back cover over the bracket arms they should now stick straight out of the book.
Step 3: Mount the Book on the Wall
- Use a level to position the book on the wall so its straight.
- Drill the brackets into the wall using screws. Use wall plugs if you are installing on drywall for better support.
- Now your base book is attached to the wall and ready to hold weight.
Step 4: Stack More Books on Top
- Stack a few more hardcover books on top of your mounted base.
- The hidden brackets inside the bottom book will make the whole thing look like its floating.
- Do not overstack 4 to 6 books is usually a safe visually balanced number.
Why Its Awesome
- Illusion effect: It literally looks like the books are defying gravity.
- Functional decor: Doubles as storage and wall art.
- Conversation starter: Guests will ask how you did it.
- Beginner friendly: Just a few tools and some creativity needed.
Great Places to Use It:
- Living Room: Showcase your favorite novels or art books
- Bedroom: Use it as a mini nightstand alternative
- Home Office: Stack reference books for easy access
- Kids’ Room: Display colorful childrens books in a magical way
If you are looking for a DIY thats both clever and classy this floating bookshelf checks all the boxes. Its quick to make costs very little and gives your wall an instant upgrade. Whether you are a bookworm or just love unique design this project will definitely elevate your space and your bookshelf game.
FAQ: Quick DIY Projects
Q: Do I need any special tools?
A: Nope! Most of these projects need just basic household items no power tools necessary.
Q: Can kids do these too?
A: Absolutely! Just supervise any sharp tools and make it a fun family activity.
Q: Are these projects budget friendly?
A: Very. Most use items you already have at home or cost just a few dollars.
Conclusion
DIY does not have to be time consuming expensive or complicated. These 5 quick projects prove that with just a few materials and under an hour of your time you can create something useful, stylish and totally satisfying. Whether you are organizing your space, upcycling old items or adding personal touches to your home these beginner friendly ideas are a great way to dip into the world of DIY.
So go ahead pick your favorite get hands on and enjoy the feeling of making something awesome with your own two hands. The best part? You will have fun and feel accomplished all before your next coffee break.